Quick Start Guide
This guide provides step-by-step instructions to quickly set up and use the kubevirt-actions-runner.
Goal
The objective of this guide is to enable you to deploy and configure the kubevirt-actions-runner for running GitHub Actions jobs on KubeVirt virtual machines.
Prerequisites
Before proceeding, ensure you have the following:
- A working Kubernetes cluster
- Actions Runner Controller
- KubeVirt
- Basic knowledge of Kubernetes and Helm
Deployment Flow
The following diagram summarizes the deployment and runtime sequence that this guide walks through.
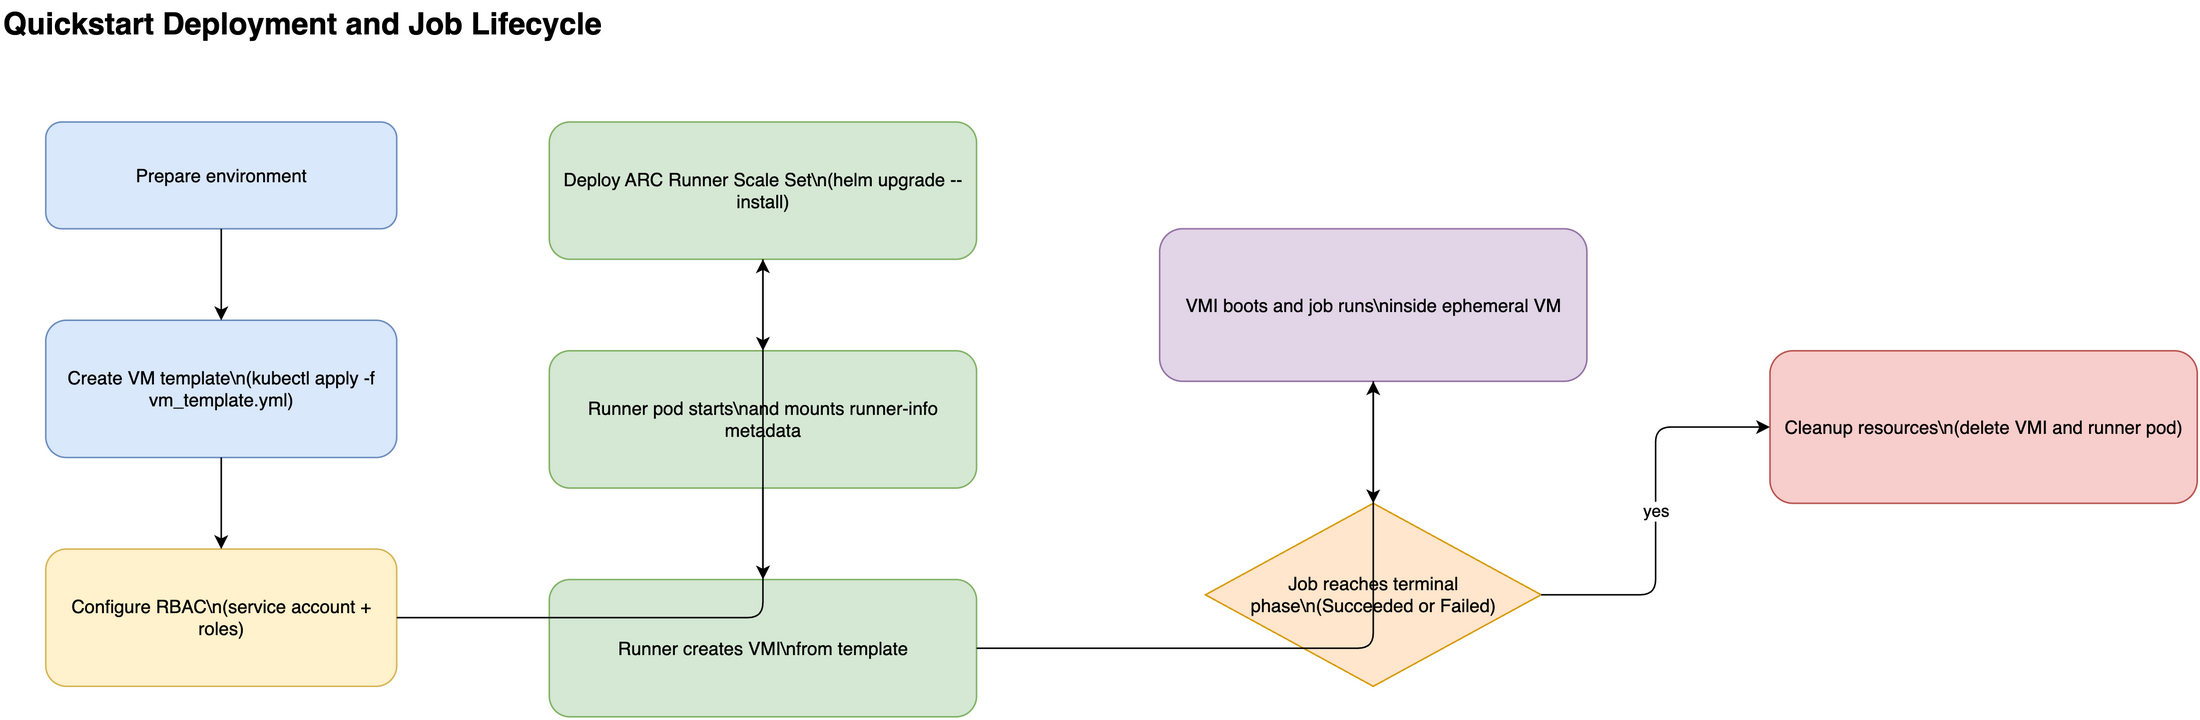
Steps
1. Create VirtualMachine Template
This template will be used to spawn VMs on-demand for each GitHub job. The base VirtualMachine will never be started; instead, clones of it will be launched as VirtualMachineInstances.
# Create namespace if it doesn't exist
kubectl get namespace "${namespace}" || kubectl create namespace "${namespace}"

# Apply the VM template
kubectl apply -f scripts/vm_template.yml -n "${namespace}"
Example snippet from vm.yaml:
apiVersion: kubevirt.io/v1
kind: VirtualMachine
metadata:
  name: ubuntu-jammy-vm
spec:
  runStrategy: Manual
  template:
    spec:
      domain:
        devices:
          filesystems:
            - name: runner-info
              virtiofs: {}
The runner-info volume is mounted at runtime and contains metadata required by the GitHub Actions runner, e.g.:
{
  "name": "runner-abcde-abcde",
  "token": "AAAAAAAAAAAAAAAAAAAAAAAAAAAAA",
  "url": "https://github.com/org/repo",
  "ephemeral": true,
  "groups": "",
  "labels": ""
}
2. Configure RBAC for KubeVirt Access
The service account used by the runner pods must be granted permissions to manage KubeVirt VMs.
apiVersion: v1
kind: ServiceAccount
metadata:
  name: kubevirt-actions-runner
---
apiVersion: rbac.authorization.k8s.io/v1
kind: Role
metadata:
  name: kubevirt-actions-runner
rules:
  - apiGroups: ["kubevirt.io"]
    resources: ["virtualmachines"]
    verbs: ["get", "watch", "list"]
  - apiGroups: ["kubevirt.io"]
    resources: ["virtualmachineinstances"]
    verbs: ["get", "watch", "list", "create", "delete"]
  - apiGroups: ["cdi.kubevirt.io"]
    resources: ["datavolumes"]
    verbs: ["get", "watch", "list", "create", "delete"]
---
apiVersion: rbac.authorization.k8s.io/v1
kind: ClusterRole
metadata:
  name: cdi-cloner
rules:
  - apiGroups: ["cdi.kubevirt.io"]
    resources: ["datavolumes/source"]
    verbs: ["create"]
3. Deploy the Runner Scale Set
Use Helm to install the GitHub Actions runner scale set.
Create a values.yml file:
githubConfigUrl: https://github.com/<your_enterprise/org/repo>
githubConfigSecret: <your_github_secret>

template:
  spec:
    serviceAccountName: kubevirt-actions-runner
    containers:
      - name: runner
        image: electrocucaracha/kubevirt-actions-runner:latest
        command: []
        env:
          - name: KUBEVIRT_VM_TEMPLATE
            value: ubuntu-jammy-vm
          - name: KUBEVIRT_VM_TEMPLATE_NAMESPACE
            value: default
          - name: RUNNER_NAME
            valueFrom:
              fieldRef:
                fieldPath: metadata.name
Install using Helm:
helm upgrade --create-namespace --namespace "${namespace}" \
    --wait --install --values values.yml vm-self-hosted \
    oci://ghcr.io/actions/actions-runner-controller-charts/gha-runner-scale-set
Verification
You can manually inspect cluster resources to confirm correct behavior:
kubectl get pods -A
kubectl get vms -A
kubectl get vmis -A
Inspect runner logs for job output and lifecycle events:
kubectl logs <runner-pod> -n <your-namespace>
To inspect a specific VMI and recent events:
kubectl describe vmi <vmi-name> -n <your-namespace>
kubectl get events -n <your-namespace>
Next Steps
- Customize the VM template to match workload and image requirements.
- Integrate telemetry as described in Enable telemetry.
- Set up a local test environment using Set up testbed.
- Use the Reference section for exact flag names and configuration variables.